Saturday, August 29, 2009
Boordy Vineyards
After catching up on some paperwork in the office, I processed a few more pics from the Boordy morning shoot. They are both HDR shots run through Photomatix, processed in Photoshop and a touch of Topaz added, well in one case a pretty good dose of Topaz, but I liked the Pop Art effect it created. Good news my Fells Point Photo walk shoot with Penn Camera is booked full!
Boordy Vineyards
This morning I had an opportunity to get out early and do some shooting, in the Long Green Valley at Boordy Vineyards. They have a great vineyard and in beautiful valley in Baltimore County. A friendly employee stopped to see I was doing and shared the name of the grapes I was shooting. I made some shots, before the sun started to shine and cast hard light. I also made some HDR shots and a few multiple exposures. It was nice being in the vineyard in the morning, harvest time is not too far away!
Friday, August 28, 2009
Basignani Vineyard
After work today I headed to the Basignani Vineyard, in Maryland's Piedmont north of Butler on Falls Road. Jim Eichelman sent me an image he made at Boordy Vineyard a week ago which gave me the idea to head out to wine country in Maryland. The grapes are ready for harvest and the harvest begins on September 4th. Jim won first place in the Maryland Wineries Photo Contest!
This years contest in in progress now, visit http://www.marylandwine.com/mwa/contests/images/Photocontestform.pdf for contest application.
The history of Basignani is on their site and is very interesting and they sponsor community events and community harvest! I enjoyed my time their among the grapes for an hour or so. I would like to go back when I have more time and do some HDR shots of the buildings and when there is better light, but I made some shots and learned some info I didn't know before, so it was a good run!
Thursday, August 27, 2009
Baltimore Camera Club New Season
Today, cut the grass, edged swept and cleaned up, whew it was hot work! But having been gone for a week it needed some attention.
Spent some time finalizing the new schedule for the 2009-2010 Baltimore Camera Club season. The first Board Meeting of the year is tomorrow night. We will have some great programs and super presenters such as Tony Sweet, Cory Hilz and Ferrell McCollough. We have field trips and weekend trips planned and a great mentor program. Can't wait to see every one's images during our competitions. In addition we are sponsoring a Seminar with Brenda Tharp on March 6, 2010. We are very fortunate to have such talented photographers in our market! Our welcome back meeting is next Thursday. Looking forward to another great year of photography at The Baltimore Camera Club.
Wednesday, August 26, 2009
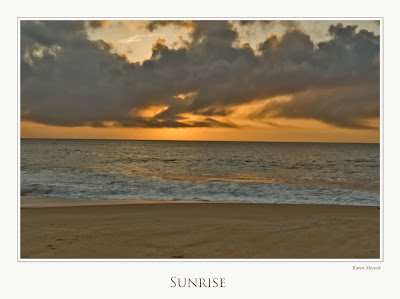
Sunrise
Packed up and headed out today, after spending a beautiful afternoon on the beach. The waves had subsided to about five feet and I went for a swim with the denizens of the sea. The water was so clear I could see the horseshoe crabs on the bottom. There was a 911 event on the beach, and I watched the lifeguards go to work in crisis mode. Evidently a man who was body surfing was smashed by a wave and was unconscious. The life guards assumed a spinal injury. The medical emergency helicopter landed on the high way and carried him off. Hmmm gotta respect the sea, it can be wicked Yesterday a little girl cut her foot while playing in the surf, probably on a shard of shell. I made it back with a few bug bites! Hope to return on labor day for a couple more days.
Monday, August 24, 2009
Last beach night for a couple weeks
Today, I awoke to a torrential down pour and thought, well that's it for the beach today, but shortly the rain cleared and I headed to the beach. The waves were still pretty big so I just waded in and played in the break for a couple hours. I had an early dinner at Captain Pete's Mediterranean Cove
I enjoyed their onion soup and dolmades, and of course some baklava. After dinner I headed to Coastal Kayak for some evening shots. As I was loading my gear in the car I saw some Frags by the lot and thought they might make some nice multiple exposures, so I played with that hand held for a few minutes. I left Coastal Kayak and, I was heading to O.C. for some Icon shots, on the boardwalk, but found myself in a traffic jam and said no way! Back to Bethany and Fenwick.
I pulled into one of Delaware's bay sites and there were two chairs unoccupied by the bay, with not a person in site, just sitting there, so they made a perfect addition to the scene, and a great escape from the traffic jams in O.C.
Sunday, August 23, 2009
One More NIght By The Sea
I am thinking everyone might be tired of seeing the ocean! But I never get tired of seeing it or photographing it! Every night, every day is different and so is the light! Tonight I started making images at 6:00 and stopped at 7:45, when the flies started biting again. Boy it was nice to have some stormy weather for a couple days, it kept the flies away. The light was also fading! Fall is not far away. Sundown is getting earlier and earlier! I was using my 17-54 zoom, I never even try to change lenses when I go out to the beach, there is just too much sea mist and fine particulates in the beach air.
I wished I had that 200mm as a pod of porpoise...swam by. I put the camera in crop mode in hopes of getting a shot where one could at least make out a fin! The evening light finally got sweet for the first time in a couple nights since the hurricane brushed the coast. It reminded me of the light painted in a Maxfield Parrish image. Tomorrow is my last full day here for a couple weeks. Its always a bummer leaving!
Saturday, August 22, 2009
More Big Waves
As usual, I headed for the beach again around 6:oo pm to do some shooting. The tide was coming in and the waves were once again pretty big for the east coast! People were actually in the water. Tomorrow they are calling for waves only 6-10 feet high seas, and to think the first day I was here there was hardly a ripple hitting the shore.
I did some more people shooting, seemed like it took longer for everyone to leave the beach tonight as the wave show was so good! I also made some bracketed shots of the beach houses with the storm clouds overhead.
Poster Frames on My Images How To
Today I had an inquiry about how I make the poster look for my images, and I was asked if I would share how I do it; I'd be happy to share. The process, I learned from reading Scott Kelby's Photoshop CS3 book, so I didn't originate the process, but will be happy to explain it here.
Once you have that menu open the canvas size dialog box will be on your screen. The box below shows the current canvas size, which is the actual dimension of your photo. To add white space around your image you will need to increase the size of the canvas. For an image this size I will add two inches all the way around the image first by changing the dimensions of the canvas size in the width and height fields.
Click just outside the top left corner of you image and drag a thin line around the image, you will see the marching ants around your image like this:
After you have the marching ants around your image go to the menu bar and click on edit and select stroke.
When you click on stroke a dialog box will appear as follows. Make a selection of width, I use 5px, then select your color, since I work on a Mac I use the color picker and grab a color sample from the image I think will enhance the image, I check "center" for the stoke depth, and choose a blending mode, the one here is the last one I used. Then hit OK. The border will be there but not so noticeable under the marching ants.
Hope that helps, and if you want to add color to the canvas in the canvas dialog box there is a color choice box on the bottom just click in it and make alternate selections. You can also use custom color here by picking a color from the image.
Hope that helps, and thanks for stopping by my web and blog!
First process your image and save the file. Then when you have your image open in Photoshop go to the menu bar and under image click on canvas size. (not rotate canvas, sorry its highlighted)
Once you have that menu open the canvas size dialog box will be on your screen. The box below shows the current canvas size, which is the actual dimension of your photo. To add white space around your image you will need to increase the size of the canvas. For an image this size I will add two inches all the way around the image first by changing the dimensions of the canvas size in the width and height fields.
I add the two inches simply by increasing the width and height, as below.
After you have done that, go back to image; canvas size; and add some depth to the bottom of the canvas by increasing the height, I use another inch on an image this size, when you do that you will need to indicate on the anchor dialog box the direction to add space, it's opposite the side you actually want the space added to. Notice the arrows and how they are positioned compared to the original anchor box. By clicking on the top arrow you will get an anchor box that looks like the one below.After executing that you image should look like this.
That's it for the canvas, now make a new layer, by clicking on the new layer icon,
in the layers dialog box.
Click just outside the top left corner of you image and drag a thin line around the image, you will see the marching ants around your image like this:
After you have the marching ants around your image go to the menu bar and click on edit and select stroke.
When you click on stroke a dialog box will appear as follows. Make a selection of width, I use 5px, then select your color, since I work on a Mac I use the color picker and grab a color sample from the image I think will enhance the image, I check "center" for the stoke depth, and choose a blending mode, the one here is the last one I used. Then hit OK. The border will be there but not so noticeable under the marching ants.
After that I make a new text layer to add my name to the lower right corner, using "Minion Pro" in italics, and set the opacity in the layers box to 50-70%
Then I make a new text layer for the name of the image, using Trojan Pro lettering. I enhance the text by clicking on the fx in the layers text box
Click on Bevel and Emboss and you get a box like this, move the sliders until you have a desired effect.Then I make a new text layer for the name of the image, using Trojan Pro lettering. I enhance the text by clicking on the fx in the layers text box
Hope that helps, and if you want to add color to the canvas in the canvas dialog box there is a color choice box on the bottom just click in it and make alternate selections. You can also use custom color here by picking a color from the image.
Hope that helps, and thanks for stopping by my web and blog!
Subscribe to:
Posts (Atom)